I’ve compiled a summary of information for those that own art or are thinking of buying a piece but have a few questions regarding the care of artwork.
Tips for Hanging and Arranging Art
Before putting holes in the wall, get someone to hold pieces up so you can take a step back and see how they look. Otherwise, you can trace the outline of each piece onto Kraft paper and cut it out. Then tape the outlines to the wall using blue painter’s tape. This will allow you to move the outlines around until you are happy with the arrangement.
When hanging a single piece on a wall, the center of the image should be about 56”- 60” from the floor. The larger the piece of art, the closer to 56 inches it should be.
When hanging a pair of works, one above the other, treat them as one large picture regardless of their individual sizes. Find the center point between them and use the 56”-60” rule.
For spacing between art on the same wall, use two inches between larger pictures. If they’re all smaller works, use an inch and a half between them. The same rule applies to the spacing above, below, and on either side of each frame.
When hanging art pieces above furniture, the grouping should ideally be about 2/3 the width of the furniture below it. (For example, if an art grouping is being hung over a 60” sofa, the ideal grouping would be about 40” in length.)
When hanging artwork over a sofa or other furniture, leave 4”-8” of space between the top of the sofa/furniture and the bottom of the art.
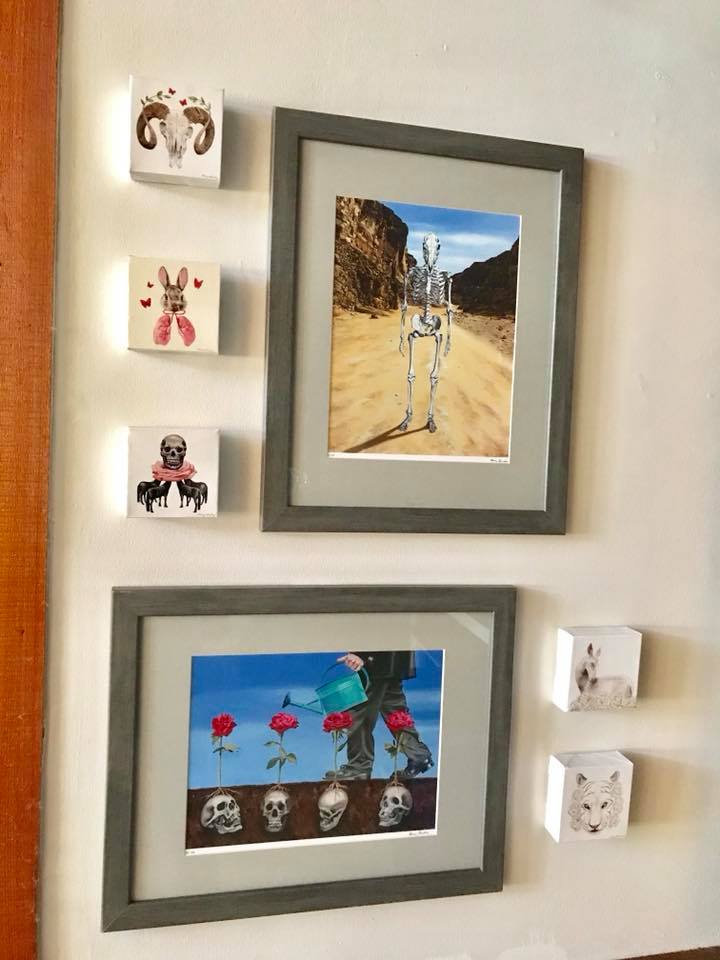
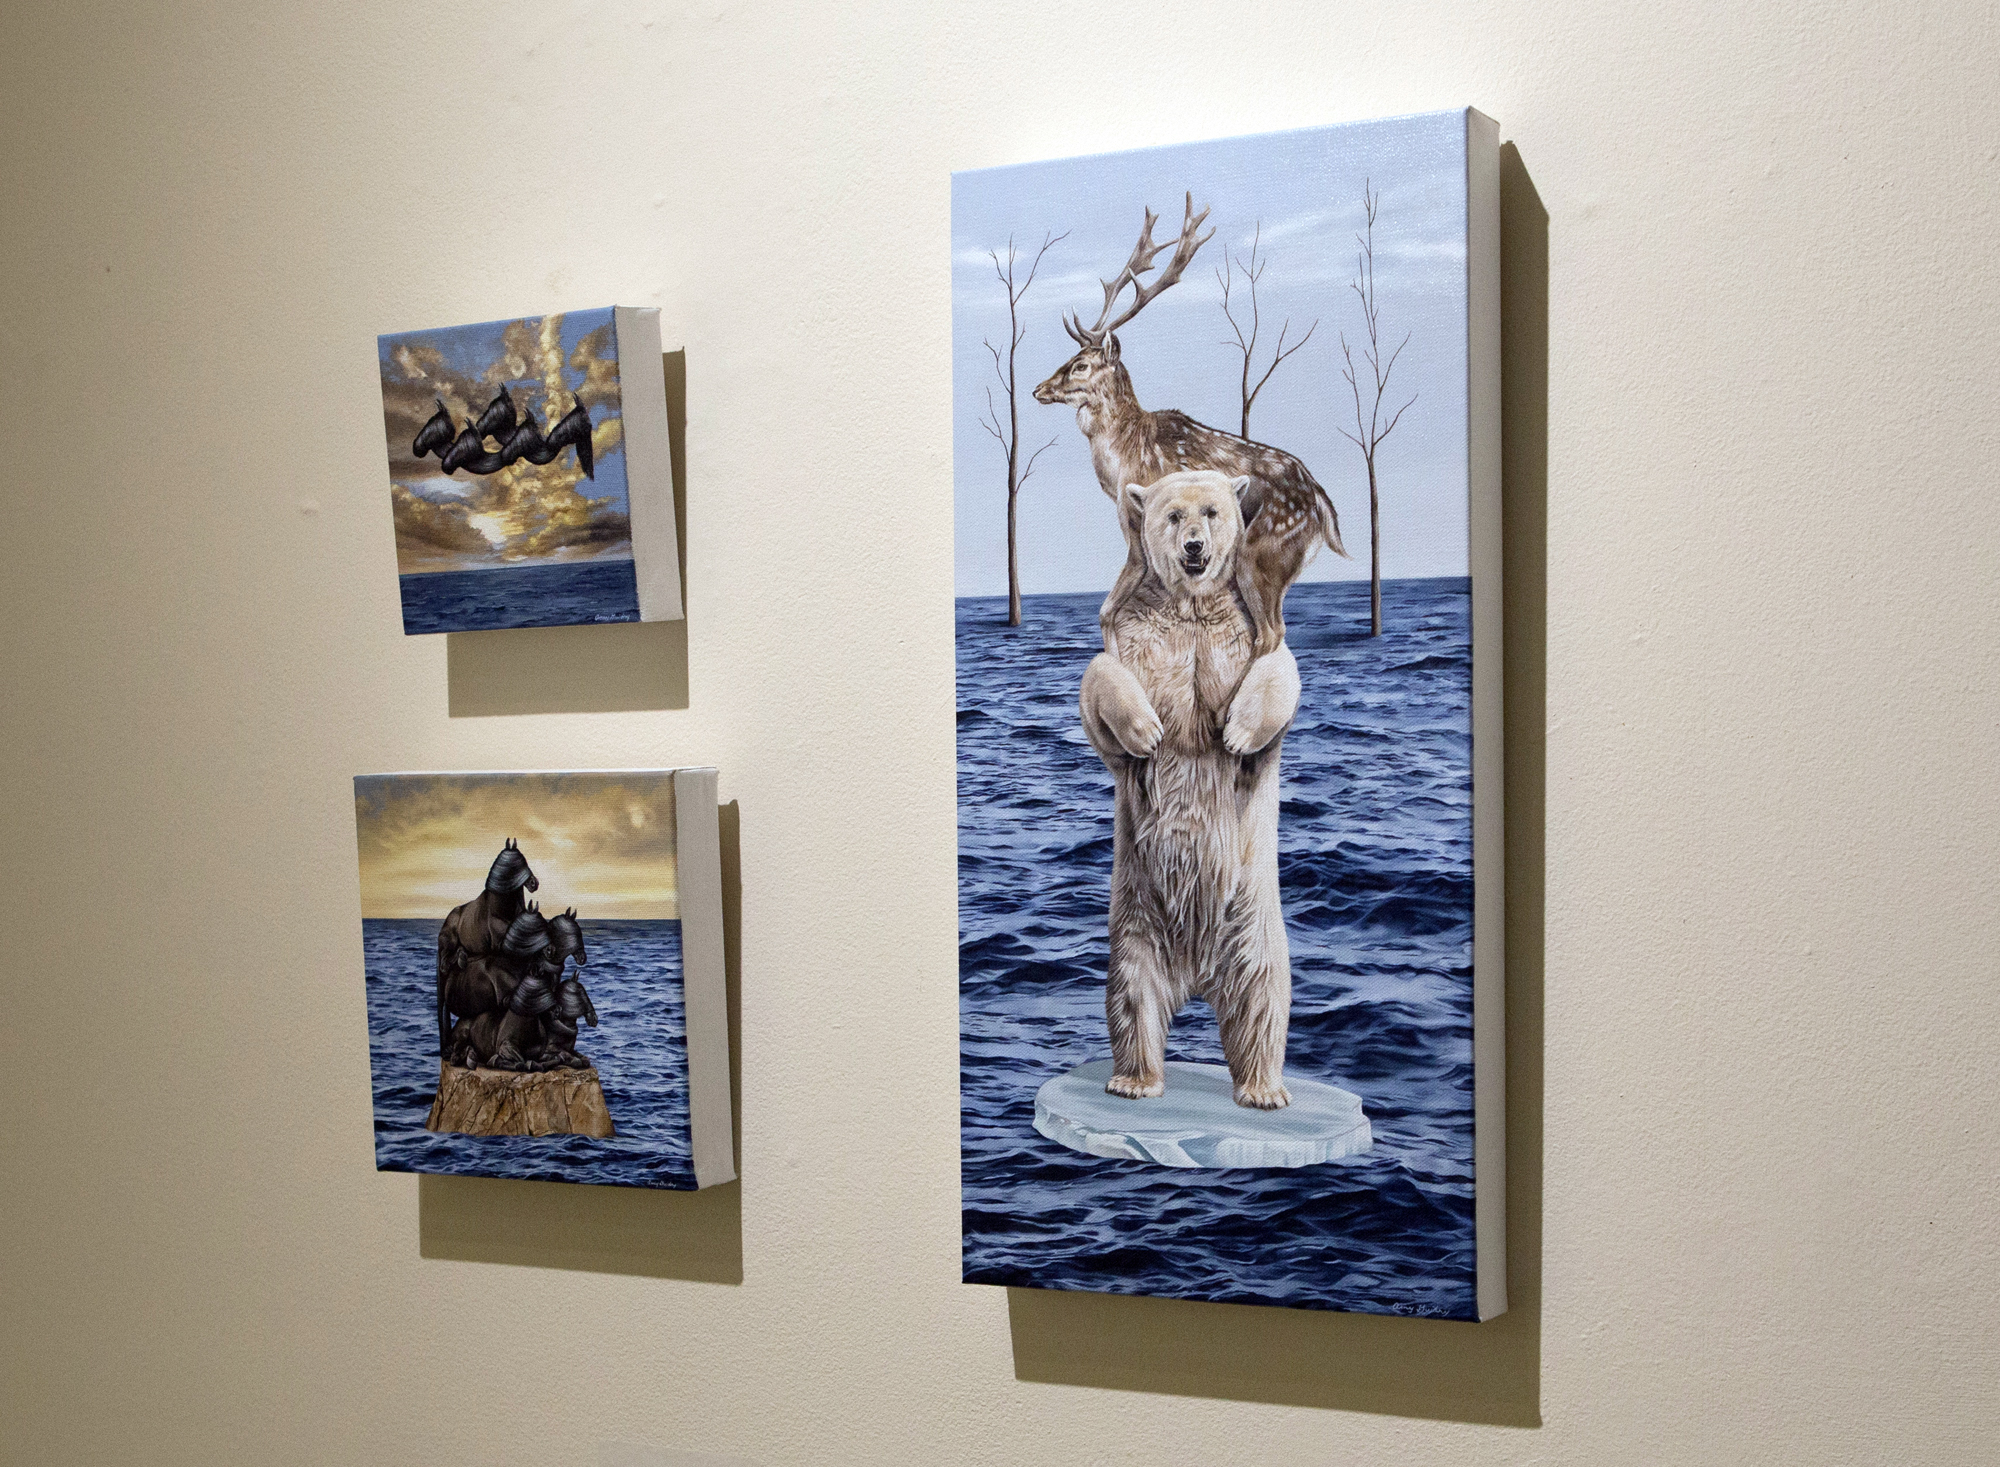
Arranging multiple works can be done as a grid or the current method of clustering varieties of styles and frames together. These arrangements can be small or take up the entire expanse of a wall. They can even be arranged from floor to ceiling. Start in the middle and work your way out.
Unique Ways to Display Art
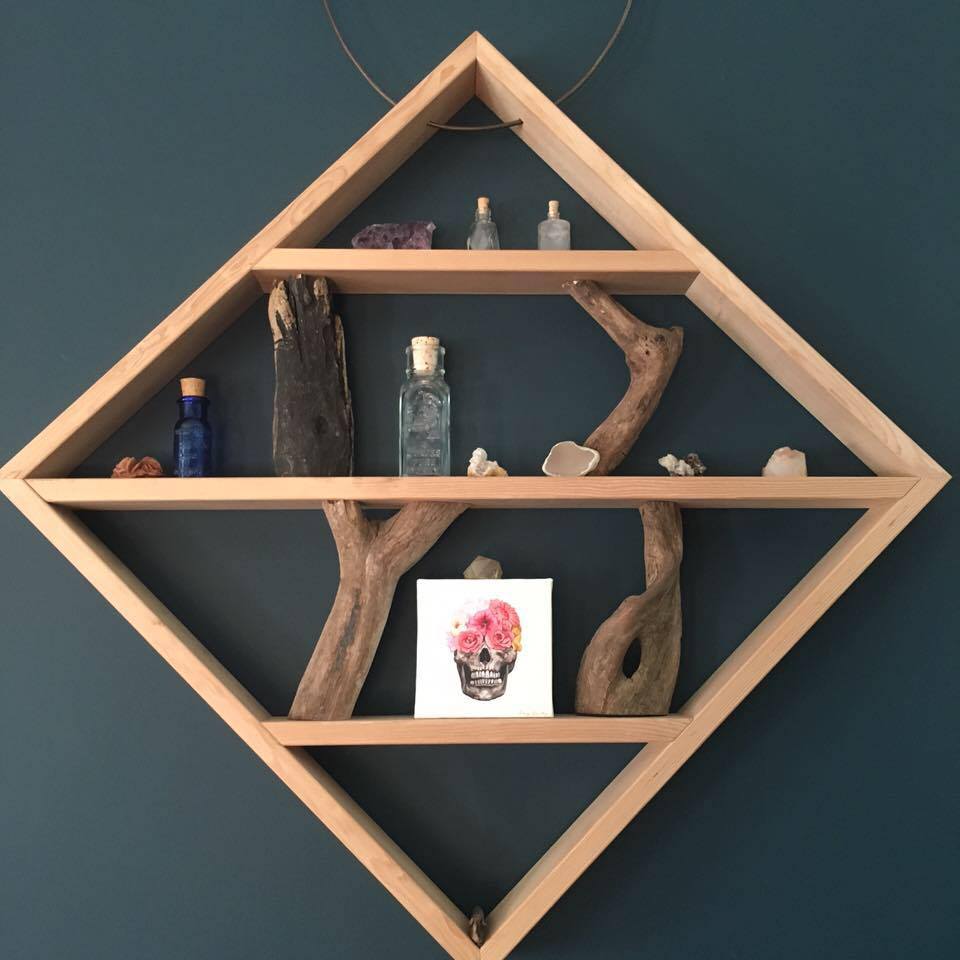
Hang art above a shelf of personal objects and collectibles with similar colors to the artwork
Divide a group of frames on mounted picture ledges. Lean and overlap frames; stagger the height of the frames for visual interest.
Highlight a particular work of art by hanging it against a contrasting wall color
Use the “rule of threes”: odd numbers of objects are usually more visually interesting. This works with both symmetrical and asymmetrical arrangements.
Consider the shape and size of your wall surface. A long narrow wall would be a great way to spotlight a tall work of art or multiple small pieces. Even the smallest wall space can be utilized as long as the art is the right size and scale for the area.
Try creating a gallery wall in your stairwell for visual impact
Display a collection of works in the corner of two walls
Hang works centered along a single line just above eye level and let it wraparound to the next wall
A variety of styles and frames can be unified when sharing one wall of color together
Try displaying art on a slanted ceiling
Hang art along the staircase itself
Display art on the back of a door (just be sure the art will not hit the wall when the door is open)
Hang art directly on bookshelves
Try displaying small works of art above door or window frames
How to Create a Gallery Wall in a Small Space
Even if you live in a small space, there’s no need to limit your art collection. A gallery wall is a great way to display your collection and can make a bigger statement than just a single piece. They can provide a small space such as a stairway or a bathroom wall with a strong visual impact and really pull the viewer in. Gallery walls have a personal feel because they consist of works you’ve collected over time, possibly during your travels, and they may take a little time to fill. For this reason, you could opt to do a gallery wall in a more private space of your home. Otherwise, you can simply arrange a small collection together and rearrange as pieces are added over time.
Should Art and Color Scheme Match?
Art can match your color scheme, but it certainly doesn’t have to. In fact, art with a contrasting color scheme can add a visual point of interest to your décor. It can add a pop of color to a neutral color scheme. A colorful work of art can liven up an otherwise boring room.
It would be best to collect what you love first (especially since original art means there’s only one available) and figure out the wall arrangement later. You can always rearrange your collection as pieces are added. And if you really feel the need to match your color scheme, you can always add accent color items such as pillows or lampshades that match a color or two in your art.
Lighting Art
Track lighting and recessed cans are the preferred types of fixtures for lighting artwork because of their flexibility for aiming at artwork. Recessed lighting with adjustable heads have a clean look, however they are not as flexible as track lighting.
MR-16 low voltage bulbs are popular for lighting art because of their compact size. They emit a small amount of UV rays which are filtered by the glass lens that comes with most MR-16 fixtures.
PAR 30 bulbs are larger than MR-16s and have a standard screw-in base. They are commonly used in recessed cans and track lighting.
Incandescent flood lights are not suitable for art lighting.
UV light rays are present in sunlight and small amounts in fluorescent and halogen lighting. They cause fading and should be avoided as much as possible.
Light placement should be set so that the light strikes the wall at 30 to 45 degrees, measured to a point at eye level on the wall, approximately 60” from the floor. So for an 8-foot ceiling place your track or recessed cans 20” to 36” away from the wall and for a 10-foot ceiling, 42” to 60” away.
Tips for Hanging Art in Sunlight
Truth be told, the best way to hang art would be in a cool, dark area void of any windows or fluorescent lights. However, this is completely unrealistic and while some works like watercolor cannot be exposed to sunlight, there are some that can withstand some sunlight.
Oil and acrylic paint can typically withstand sunlight, with very little fading. There should be no bare (unpainted) areas of canvas showing, though, since sunlight can damage canvas.
Works on paper such as watercolor and photography should never be hung in direct sunlight. Even indirect sunlight can cause fading. UV plexi glass frames can minimize damage but will not prevent it entirely. It would be best to hang these pieces in an area such as an alcove without windows. Indirect sunlight would need to be limited to no more than several hours a day.
How to Move Art Safely
You should always pack fine art yourself. If you’re using a moving company, they must have experience with fine art, and provide references if at all possible. To be safe, though, it would be best to do it yourself.
First wrap the art with glassine paper, taping the paper to itself (not on the art). A clean cloth (free of any stains or dyes that could transfer) can also be used, especially for sculpture. Cover with a few layers of bubble wrap and hold in place with packing tape. Before boxing, cover the bottom of your box with tissue paper or Kraft paper, place art inside and continue to surround the art with more paper along the sides and top of the box. Be sure to mark the outside of the box as fragile and with “up” arrows as needed. Purchase crate or mirror boxes, or see if your local art supply or home décor store has any extra boxes they would be willing to give for free.
Art is sensitive to heat and humidity, so unless you are using temperature-controlled storage during the move, it needs to be relocated as soon as possible. Letting it sit in the box to acclimate to the climate for a day or two is fine, but it should be removed from the box soon to prevent any warping.
If you have a large collection, you may want to consider hiring a professional art handler. Find someone with many years of experience moving art. If you are moving far, use a company with climate-controlled trucks to avoid any damage from heat or humidity.
Get the latest updates via my monthly newsletter: www.amyguidry.com/contact.html
Now on Instagram: https://www.instagram.com/amy_guidry_artist/
Follow me on Facebook: www.facebook.com/pages/Amy-Guidry/51953219932
